F tamdoll's workspace: holiday - halloween
Showing posts with label holiday - halloween. Show all posts

Simply Bewitching

October 29, 2021

Sorted through my attic and found some dolls I'd almost forgotten about!
 

Quick and Easy Halloween Wreath

October 20, 2015
If you can hold a glue gun, you can make this Halloween wreath.

I was inspired to make one of these when I saw ilovetocreate's neon version. Here's the one I made, hanging in my daughter's dorm lounge:
halloween eyeball wreath


Step 1: Wrap a wreath frame in fabric. I used a 10" straw wreath & strips of fabric I ripped from a 45" long piece. I used 4 strips, and each was about 2.5" wide. Accuracy isn't very important, this base will be mostly covered up in the next step. The strips were held down with dabs of low-temp hot glue. Once it's all wrapped up, tie a string around the wreath to use for hanging.

Quick and Easy Halloween Wreath step 1

Step 2: Start gluing on balls. I used beer pong balls for this project because they were cheap and light-weight. Laying the wreath on a table, and gluing the balls down as it lay flat ensured that it wouldn't jut out from the wall when it was done. Spacing and accuracy isn't very important - not taking this too seriously.

Red fabric showing through? Strands of glue everywhere? = Creepy.

Quick and Easy Halloween Wreath step 2

Step 3: Keep adding rows of balls, filling in holes and spaces as you go along. Work your way around and into the center of the wreath. Step back and look at it once in a while to cover any gaps you may want to fill.

Quick and Easy Halloween Wreath step 3

Step 4: Glue on googly eyes. Angle some sideways, adjusting for where the eyeballs are placed (on the sides of the wreath, put the eyeballs a little more sideways.)

Quick and Easy Halloween Wreath step 4

That's it. When I was all done, I thought I should have used red glue sticks... maybe next time.


I have low expectations that this project will last very long hanging in a dorm room, and who knows what will happen to it after Halloween. But it was fun to do, and took less than an hour to make. Using a glue gun kept this project low-stress - everything dried within seconds of putting it in place.


I often hesitate to make Halloween costumes or decorations, the event comes and goes so quickly, the effort often seems more work than it's worth. But this project was a breeze, I've already made two for my girls and have enough balls to make a third... maybe I'll be hanging one outside my door this year.

Will you make decorations for Halloween?

One more picture, because I love the Pixlr.com apps and they just put out some Halloween borders and layers:

halloween wreath creepy eyeballs by tamdoll

October

October 5, 2012

Just a quick update with a Halloween-themed project.

2012 october halloween crochet ornaments by tamdoll


2012 october halloween crochet ornaments by tamdoll


Does this make you want to learn how to crochet? At first I learned out of necessity – a knitted baby blanket needed a crochet edge. After that I was driven to learn so I could create amigurumi toys & it’s been non-stop ever since!

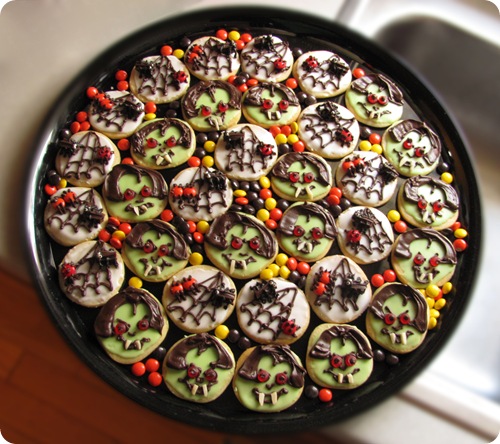
Boo!

October 31, 2010

Boo! from Tamdoll.Net Boo! from Tamdoll.Net Cookie recipe and design from Family Circle magazine, 1996.  Made by Tamdoll 2010.

Artful Thursday – DIY Candy Bar Card for Halloween

October 28, 2010

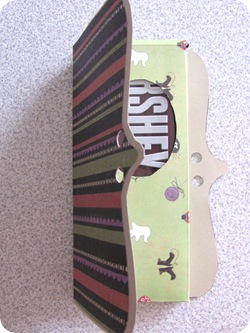
When I saw this adorable Candy Bar Card project*, I knew I had to make one.

Of course I had Halloween paper in my stash:Tamdoll's Halloween Paper Stash I also still had my package of glues and scissors from the Elmer's® Crafters' Campaign (being a BzzAgent, I occasionally participate in different campaigns and share my opinion about products that I receive). This project was really quick and easy once I joined Paper Craft Planet and printed out the templates. 

Once I cut out the templates it was really easy to glue things together:Tamdoll gluing My adhesive stash will NEVER again be without this glue pen.  Never. I loved it.  I am usually so messy, putting glue on projects with my fingertips.  That fine tip was perfect.  (And yeah, I have an adhesive “stash”.  A whole drawer of different glues for different materials… doesn’t everyone?)
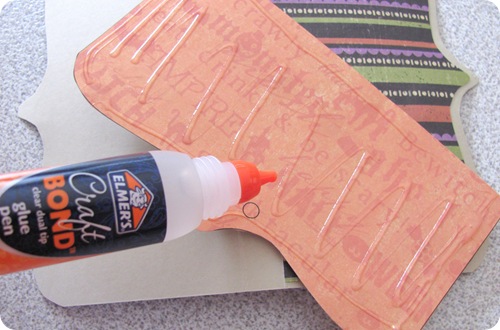
Next, back to the handy tape runner for skinny spots that I wanted to stick instantly and not have to hold-in-place… but I got a little carried away and glued the opening closed!  So, here’s a tip: baby/talcum powder will coat the sticky stuff and make it ineffective:Tamdoll unsticks the glueWhew.  Thank goodness for that.  There’s a reason a trial-sized powder is always at my desk.
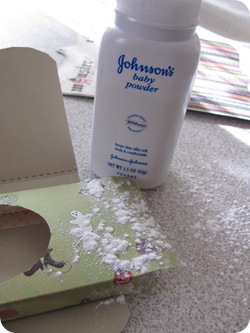
Insert candy bar:Tamdoll's card in progressIt’s almost funny how no one in this house really notices the projects I’m working on until a chocolate bar appears on my table.  Everybody wanted to know what it’s for – I had to finish this project quickly!

I thought the card could use a little more embellishing – so pulled out the X-Acto® scissors and Corner Round Punch from the BzzAgent campaign kit, and stamped some Halloween images on scraps of paper:Tamdoll's tools

I will admit that decorative scissors, in general, are not one of my favorite tools to use.  I’ve had many, many brands of these and am never thrilled with how bulky they feel in my hands, so I usually avoid them.  These did a good job cutting, sharp and accurate.  The corner rounder gave a nice cute finish and worked fantastic – best part, no jagged edges where corner meets edge.  If you’ve used a corner punch before, you know what I’m talking about.  If you haven’t – what I’m saying is: This did a good job.  A few dabs of ink and:Tamdoll Embellishes

Stuck these embellishments on with Glue Spots that came with the Elmer's® package to raise them up & give them some added dimension.  Mysteriously, after some school projects this week, I only have three left – I guess the kids found them handy and put them to good use for their crafts, too.  Added a ribbon tie and that’s it!

Tamdoll's Halloween Candy Bar Cards

*Template, design & project © Leigh Ann Baird.

Happy Artful Thursday! Artful Thursdays

Do you do anything crafty for Halloween? 

I loved reading Jane P’s comment about the Hungry Ghosts Festival, it’s really interesting to learn about different customs.  Thanks for stopping by!

Halloween was Scary

November 4, 2009
Had fun at the party.  But my costume wasn’t as flattering as I had hoped.  I guess that’s what I get for waiting for the last minute … like trying to find snakes to wear in my hair Halloween morning, or 1/2 hour before the event, making alterations in a hotel room.
craftfail

That’s as big a picture as you’re going to get here.  (I really, really wasn’t happy with this.)  What’s that on my head you say?  A pony tail, with braids, desperately holding onto these heavy, slimy feeling snakes:

snakes on a head 
Next year I will either plan earlier or suck it up and buy a costume.

Almost Midnight

October 23, 2009
(In my part of the world, it’s almost midnight.  I love that readers can be anywhere at anytime though!)  I almost forgot to put up my blog post for the EtsyBloggers Carnival!  The question I’ve chosen to answer is all about… Halloween!  “What are you doing to celebrate this year?”

I’ll be doing a couple of things this year.  First of all I was invited to a Halloween party & want to dress as Medusa.  I had a plan for my hair and a few snake embellishments… but the dress was driving me crazy!  I saw a costume in the shop but it was $45 and I really didn’t want to wear one of those plasticky things.  

So… I ran to the consignment shop, got a 10 minute parking spot outside, saw a grey dress in XL and bought it quickly: costume in progress
It’s a long top and a long skirt & I’m sure someone’s mom looked great in it at their wedding.  And for $25 I have a silk outfit with thousands of beads to play with that’s going to be super comfortable!  I’m going to [try to] take off the sleeves and maybe use some of the sleeve liner fabric to tie/gather under the bust to add some shaping to the outfit.  I may gather the top of the removed sleeves and wear them lower on the arms, too.  I’ll add snakes to my hair and around my hand, maybe upper-arms, too.  Heavy grey eyeshadow, maybe face-paint?  Not sure about that one.  Of course, I’ll probably work on this last-minute sometime during the week and post pictures after the party.

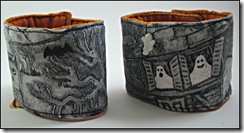
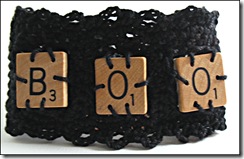
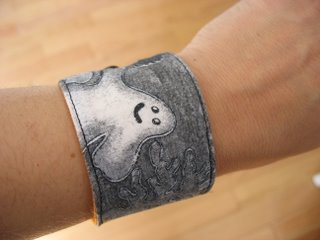
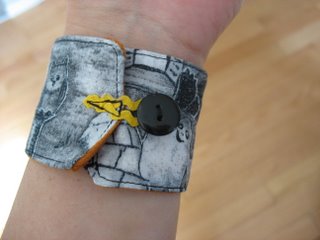
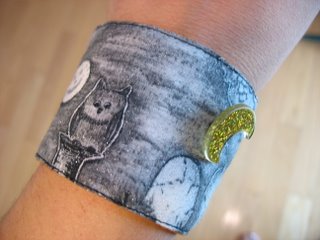
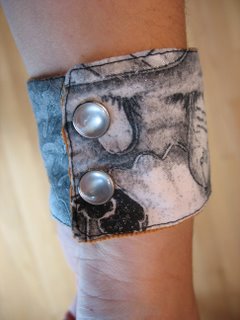
The other thing I’ve been working on are some Halloween cuffs.  I seriously have to add crafting to my daily planner & put holidays on my to-do list months in advance.  I’m pretty lax about this, but really, can’t get the motive to work on winter holidays in the summer-time!  Maybe one of these years I will… For now, I finished a handful of cuffs and listed some on Etsy, and delivered others to my favorite local shop, Apotheca:
ghost snap-on cuffs orange cable cuff freeform scrabble cuff Boo! cuff
Boo!

For now I've packed away my Halloween supplies and will try to remember to work on these things next August.  And fyi: drilling tiny holes in Scrabble tiles is tricky!  I broke a few bits and a few “B”’s – and there aren’t too many of those in each game box!

I can’t wait to read the rest of the blog carnival and see what other folks have planned.  Have any Halloween plans?  Or.. how far ahead do you do your holiday crafting?

Green & Black Halloween

October 31, 2006
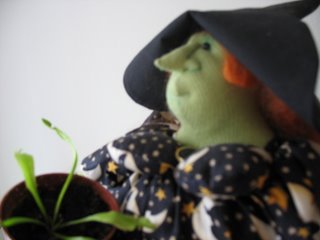
To those of you out there "trick or treating" - Happy Halloween. Here is Matilda and her Venus Fly Trap:

BOO!

Halloween Cuff #2

October 26, 2006
much better

Still working on it.

with snaps

Halloween Cuff #1

first try
too tight
Prototype #1
-needs to be longer so I can use the snaps I planned on putting in....
Powered by Blogger.
Back to Top