F tamdoll's workspace: fabric
Showing posts with label fabric. Show all posts

Artful Thursday – Easy Drawstring Bag Tutorial

December 23, 2010

This is a super easy and quick project… it’s taken me longer to photograph and write up a how-to for this blog post than it did to create this bag.  I whipped up a bunch a few nights ago to wrap some presents in and find it’s a great way to use the mounds of fabric that seem to multiply around here (t-shirts are fabric, too!).  These an eco-friendly way to wrap presents – no paper filling up the recycling bin and they can be washed and reused (how about: a travel bag for shoes;  toy pouch; makeup bag; lingerie bag; storage… how many ideas can you come up with?).

 Tamdoll Drawstring Bag Sewing Tutorial 10

What you’ll need:

  • Knit fabric – it doesn’t unravel or fray at the edges. (t-shirts are great!)
  • Needle, thread, scissors – sewing by machine or hand – for machine sewing you will need a ball-point needle – essential to sew through knits smoothly.
  • Ribbon, cord, shoelace, heavy yarn, etc… for drawstring.
  • Safety pin or bodkin to help thread the drawstring.
  • Embellishments optional – ribbon, embroidery floss, appliqués, fabric paint, etc. – whatever you can think of.

I’m not going to tell you how much fabric you’ll need since I don’t know what you’re wrapping.  How to figure it out?  If you were going to wrap it in paper, that’s about how much fabric you’ll need– you will need some of the overlap for your seams and the drawstring part – so it’s an easy estimate to just lay your item on your fabric and cut away,  no rulers necessary.  Same goes for cording and embellishments – they all go according to the size of the bag you’re making.

How To:

Cut out fabric:Tamdoll Drawstring Bag Sewing Tutorial 1

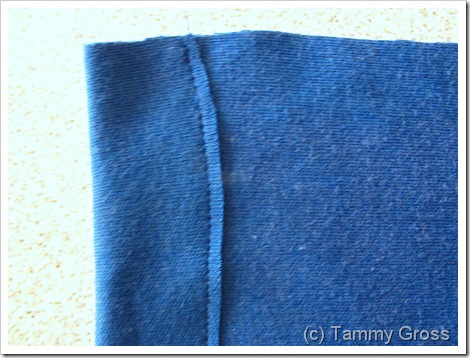
Create drawstring casing - fold over one long edge so that your drawstring will fit inside and stitch close to the edge:Tamdoll Drawstring Bag Sewing Tutorial 2 I went back and did another row next to that line of stitching to make it extra-sturdy.
Turn to the right-side and embellish your bag:Tamdoll Drawstring Bag Sewing Tutorial 3 Here I used ribbon** from my etsy shop.

Now fold, right-sides together and stitch around three sides – starting just below your casing:Tamdoll Drawstring Bag Sewing Tutorial 4 I trimmed all edges with pinking sheers when I was done.
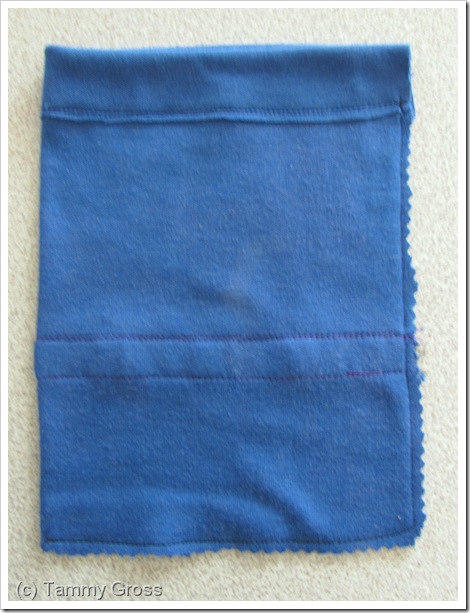
If you like, you can fold up the bottom edge and sew across the two corner triangles that are formed.  This will create a cute flat bottom for your bag.  You can make very large triangles, too, if you want to make a wider bottom for your bag (it all depends on what the bag is for.) Bottom inside-out view:Tamdoll Drawstring Bag Sewing Tutorial 5 Next, you can trim off those pieces on the corner so they’re not lumpy in your bag:Tamdoll Drawstring Bag Sewing Tutorial 6

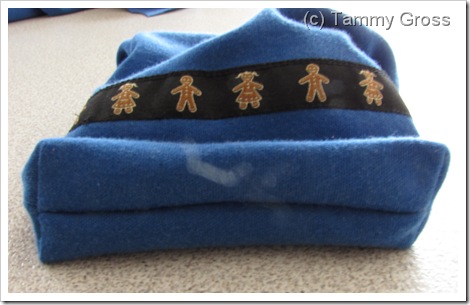
Turn right-side out:Tamdoll Drawstring Bag Sewing Tutorial 7 Sorry about the smudge mid-picture… I thought I was getting sun-glare.  Turned out I just needed to clean the lens of my camera.  Must have been from yesterday’s snowy pictures – guess I wasn’t as careful as I thought I was protecting it from wetness.

Almost done!Tamdoll Drawstring Bag Sewing Tutorial 8

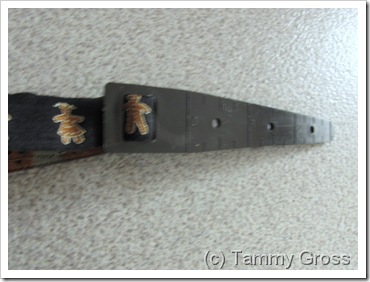
One more thing is to thread the cording.  In the past I’ve used a safety pin or a pair of hemostats, but I picked up this “Elastic Pull-Thru” by Dyno at an antique store and it’s been super-handy.  I found something similar online:Tamdoll Drawstring Bag Sewing Tutorial 9
Threaded, knotted, gift added, cinched and now it’s ready to go:Tamdoll Drawstring Bag Sewing Tutorial 10

Let me know if you make any of these, and add a link in the comments to share.

Happy Artful Thursday! 

**I’m kind of tired of selling ribbons in my shop – if anyone wants all the yardage that I have left (it’s not all listed)– make me an offer, please!
Practical Sewing

August 9, 2010

"Necessity is the mother of all inventions"

Necessity:

Tamdoll's Eyeglass Case

I’m the mother. 

Invention:

Tamdoll's Eyeglass Case

Soft polar fleece lining to keep my sunglasses scratch-free:

Tamdoll's Eyeglass Case

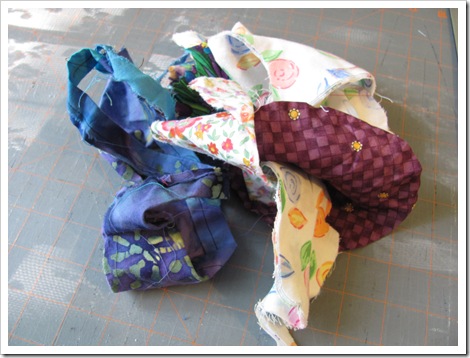
Squares were cut 1.75” x 1.75” and pieced together using the help of this tutorial.  In addition to finally using the flexi frames that I purchased a long  while back, I got to use up a bunch of scraps that I had piled in a basket on the floor near my work table.  Add your scrappy pictures to my “Off the Floor Recycling” flickr group here:

Off the Floor Recycling
(You can save that picture to your blog and link to the group if you like.)

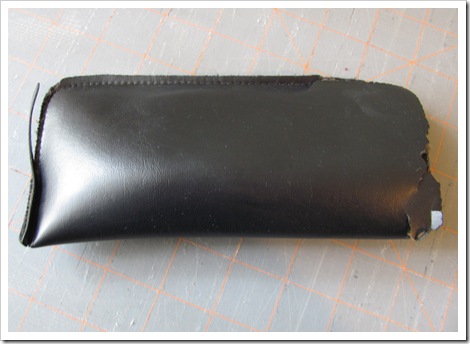
“Before” picture:

Tamdoll's Eyeglass Case

Tamdoll

At my Etsy Shop - Tamdoll's Having a Sale ** SALE through 8/15 ** 40% off non-ribbon items with "Birthday" in notes to seller.
My birthday - your gift! Everything sold this week will ship 8/16. **

Artful Thursday – Stamped Wall Hanging Tutorial

June 17, 2010

I’ve had this “Commandments” stamp for a while, and it’s always given me trouble when I use it on paper, so I thought I’d try fabric today. I had fabric remnants from curtain lining created years ago so thought this would be a great canvas to make a wall-art present for an upcoming Bat Mitzvah.

The image on the left was created when I placed the stamp face-down on the fabric in the “traditional” stamping method. The image on the right was created when I lay the fabric over the inked stamp and used a brayer to roll over the top.

Tamdoll stamping on fabric

Careful! Don’t let the fabric slip around.

Tamdoll Inking with Brayer

Next, I cut out squares of cotton quilt-batting for the backs:

Small pieces of cotton batting

I layered the quilt batting and another piece of white fabric behind each piece, then using the free-motion foot on my sewing machine and metallic thread, I outlined some of the images that I stamped.

Free Motion Quilting Metallic Threads

I kept going back, adding more details, then beads to make the image pop. I'm enjoying the mixed-media approach to art, I can incorporate all the things I love to do!

Completed Bat Mitzvah Mixed Media

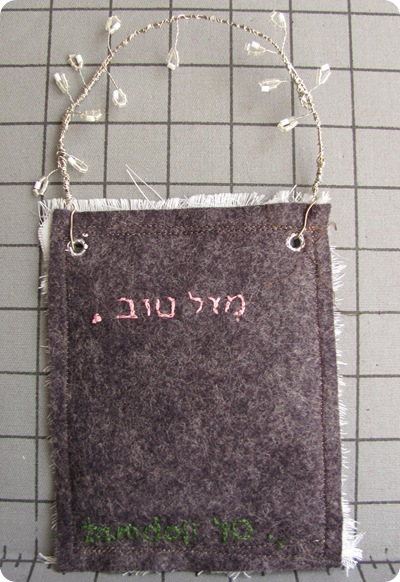
After I was satisfied with all the beads and quilting, I sewed a piece of sturdy wool felt to the back of the piece and added grommets to hold a hanger. Taking a tip from one of Paper Bird’s Artful Thursday tutorials, I used wire and beads to create a hanger.

Mazel Tov

On the back I embroidered the Hebrew words “Mazel Tov” - which translates to Good Luck, and is used as a “Congratulations”. I was glad to make this for a friend’s daughter and I hope she enjoys this unique piece!

Happy Artful Thursday.

Artful   Thursdays

Artful Thursday – Ideas Come Alive

March 4, 2010
tiny purse 
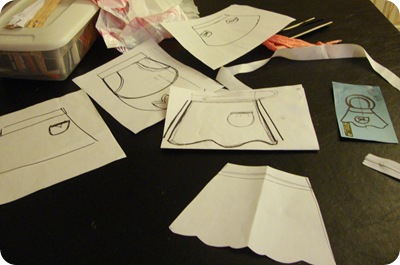
 I had an idea to make an apron for a friend.  A 50’s, retro-inspired, domestic-diva-type creation.  Then I said to myself…. “she won’t wear it…” … so I thought, I’ll make it into a handbag.
ideas (Original handbag idea is on the blue scrap of paper – I keep lots of recycled paper around for these things.)

Then I thought…. “who’s going to carry around a bag like that?”…. so decided to make a little clutch-purse.  Great idea!   You can see some of my drawings and then I cut one out of paper to use as a template.

Next step – dig out the inspiration fabric – you can see here, I found a sleeve – from some vintage fabric I had -
fabric  (Oh no! Don’t use the vintage fabric on a prototype! … Too late…)

Cut out the pattern pieces out of stiff interfacing so the shape would hold up and ironed it onto the wrong side of the fabric:iron-on interfacing

Cut out about 1/4” around the pieces and pinned it to lining fabric (remnants from curtain lining) to use as a cutting template:
cut out and cut out lining

Next few steps, I forgot to take pictures ….  I made a little embellishment for the front of the pouch and sewed that on.  Then I basted black piping to one side of the outer fabric before sewing front and back together.  I also sewed the lining fabric together and realized that the 4” zipper I had for this wasn’t going to fit.  So, I added snaps to the lining then slipped it inside the pouch.  snaps inside 
Once that was done, I used some bias binding to cover up the raw edges at the top and create a carry-strap.  Done!
finished!

As you can see, it needs a little work – stitching on the embellishment on the front went a little wonky and I’d like to make another bag with a wider top to insert a zipper. 
I think this method – of  a stiff interfacing - would lend itself to making little purses with definite shapes.  I’m thinking of a cupcake, a house and another apron.  I have a bunch of white and tan 4” zippers, so that’s what I’m going to work with – searching in my fabric stash for some coordinating fabrics.

What shape would you make?

Read more about Artful Thursdays and visit the other participants here:ArtfulThursday

A Crochet-Along, a challenge, and letter of last week.

March 25, 2009
I learned to crochet last year and can’t believe it took me so long to pick up this great craft.  I also joined Fabric Knitting & Crochet at Ravelry & on Flickr.

At Ravelry, there’s a March Knit/Crochet-along “Baskets” and “The Complementary Color Challenge”.  So, here’s what I’ve come up with….

First step was to dig through my stash of fabrics and decide what would be complementary – pink and green popped out at me with their spring appeal.  Oh yeah, let’s throw in “K” week for “Kelly Green”.  vintage top Off to the ironing board I go with the pink fabric and what do I discover??? My vintage pink fabric scraps have turned out to be someone’s work-in-progress.  (A bag if clothes and fabric from a local senior, love these finds!)

So, will add that to my “to-do” pile.. it’s a toddler size I think(it’s sitting on top of my clothes dryer and is kind of small).  Not sure how I’ll put it together yet. 

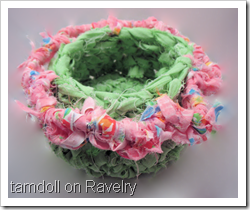
To make a long story short, ripping fabric into strips is not my favorite thing to do… but I went ahead and free-formed a bowl and edging. Took the edging out and did it over again.  Here’s what I came up with, finally:

Fabric Basket 

Kelly green bowl with pink scalloped edging.  Overall, I think this working with fabric is something I have to get the hang of.  It looks like I needed to pull tighter in some spots or finesse the size needle I used per the width of the fabric.

Love Letters 2009 – Complete!

February 11, 2009
Love Letters Mailbox
Love Letters 2009
Lavender-filled, heart-shaped sachet in each envelope. They’re pretty easy to put together...


Enjoy & be sure to give me feedback!

Holiday Ornaments

December 11, 2008

Inspiration:

 j0436472[1]

Creation:

three linen ornaments

Been making some linen, heart-shaped ornaments to sell with embroidered words, sterling silver charms.  I think this evening I'll make a few more of these, but instead want to work on a house motif.  My craft room smells heavenly with the scent of cloves!

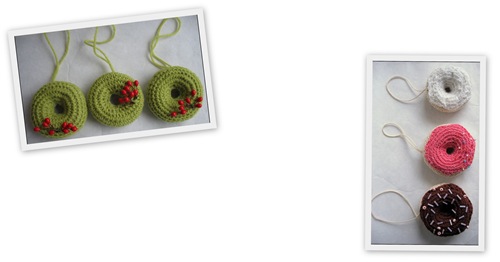
Some more ornaments based on the Lion Brand pattern for Amigurumi Frosted Donuts; also brought these to Apotheca, you can see them hanging on a tree in the shop in my last blog post.

click to visit my ravelry page

Blog readers, if you like my pictures, thanks! Please! Please! If you copy any to use on your own blog, just drop me a comment on any of my posts or send me an email (tamdoll(at)comcast(dot)net) and make sure you give me credit with a link back here.  I'd appreciate it and it would save me a lot of time figuring out where my links are coming from.

Blue Bracelet

June 11, 2008
Blue Asian Cuff BraceletMade this bracelet the other day, now I need to make a bunch more and then bring them into a local boutique for sale. I'll also put some up at my etsy shop. I've been having fun making these, taking some pretty beads I've been storing and taking some of my doodles and turning them into embroidery on these bracelets.

Aliens Have Landed

June 5, 2008
AlienAliens have landed.
On your wrist!
He's available at my etsy shop. Clicking the picture will take you to flickr to see different views.


I have a lot of these cuff-style bracelets in mind to make and finally am able to work on them. What was holding me up? I was worried about the closure. Obsessing. Trying out different methods... then I realized "I don't want to make closures! I want to make bracelets!" So I got to work and wala! I thought of a clever way to make a comfortable, slightly adjustable closure - I knit a bit of ribbing with a button-hole in it and there you go. I think just letting it all simmer in my mind for so long helped to birth that idea. Now onto some new ones... I hope to have a few listed by Sunday the latest.

Bags, Bags, Bags

July 12, 2006
I'm back from vacation & read about the whiplash Bags..... so here are some of my bags that were posted on flickr.... Maybe tomorrow I'll put up a felted original with directions....

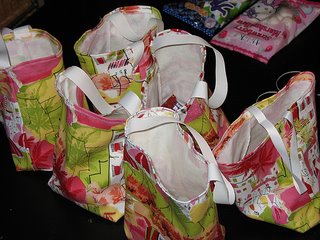
Mini tote bags used as party-favor bags.
Party Time!

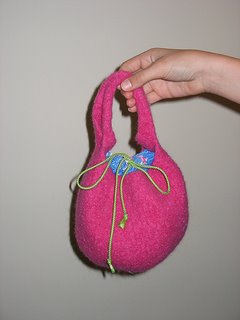
Knitted & felted bag with a fabric lining.
Pretty in Pink.

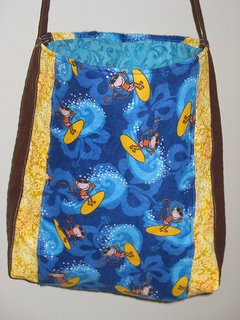
Monkey business.
Monkey tote patchwork pieced & quilted out of 4 different fabrics.

Horsing around.
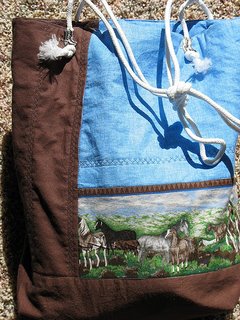
Horse tote patchwork pieced & quilted.
Powered by Blogger.
Back to Top